
Applying QoS
Applying Quality of Service to Web Services is vital since it creates high quality of services in terms of non functional attributes like security and reliability. QoS can be applied to Web Services by associating it with the Web Service Definition Language (WSDL).
Below example shows how to apply QoS (Quality of Service) for a service via Developer Studio and deploying it in the server.
- First deploy the service to the server and get the URI of the WSDL.
- Then right click on the project where you want to apply QoS and then select “Apply QoS” from the menu. Then you will get a wizard to create a new QoS project. Give a name for the project and select Next.

- After that you can give the URI of the WSDL as shown below in the WSDL Selector wizard under the ‘WSDL URI’ option. Then click on Next.
 Note :
- If you are using an Axis2Service Project, after creating the project you can right click on the project and select ‘Generate WSDL’. Then in the WSDL Selector wizard, under the ‘Browse workspace’ option you can browse to the relevant wsdl file as shown below.
 2. If your Axis2Service Project has existing WSDL, then you can choose ‘Browse file system’ option under the WSDL Selector wizard.
- After that you can give relevant maven information for the project and finally click on Finish.
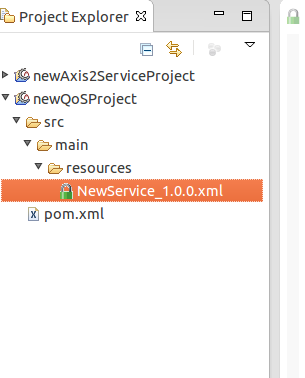
- Now you can see the QoS project has been created in the Project Explorer.
- In the QoS editor you can go the “Service Info” category and enable security by selecting ‘Yes’ from the combo box.

- After selecting the relevant options you can click on ‘Save’
Note:1. Basic Scenarios
If you select ‘Username Token’ under the ‘Security for the service’ category and ‘Basic scenarios’ sub category then you have to click on ‘User Roles’ button.Then a window will pop up as shown below. Please make sure your server is running at this time. Then fill the relevant information. After that under the ‘Roles’ section of the above window click on ‘Get Roles’ button. Then you will get a chance to select the roles as shown below.
 Then click on ‘OK’.2. Policy from RegistryIf you select the option ‘registry’ under the ‘Security for the service’ category and ‘Policy from Registry’ sub category then click on ‘Browse from Registry’ button.
 Then a window will pop up and then click on the ‘registry’ link
 Then another window will pop up to select the policy file. Select the policy file and click on ‘OK’
- If you go through the created QoS project you can see a policy file has been created inside the project. You can view it by right clicking on it and open it with xml editor.
- Next create a CApp including the QoS project you created and then create a CAR.
- If you haven’t deploy the CApp created including the project which you applied QoS then first deploy it in the server.
- After that you can deploy the CAR which created including the QoS in the server.
No comments:
Post a Comment